31. In the Actions palette, click the triangle button in the upper right corner, select the loading action from the pop-up menu, enter the PhotoshopGoodiesActions directory, under the buttons, specifications, commands, image effects, text effects, textures, frames six The action set contains a lot of practical stuff! In addition, there is an ACTIONS.PDF file in this directory, which can be opened with Adobe Acrobat software, which details the use of these actions and the effects produced.
32. Click on the brush category tool in the toolbar. Click the small triangle on the right side of the brush label in the subsequent property bar. In the pop-up menu, click the small arrow and select "Load brush...". Select *.abr in the Brushes folder of the Photoshop directory. It turns out there are so many lovely things here.
33. Draw a beautiful mark that you want to reuse in your work? Easy to handle, select it with a lasso tool, select "Save Brush..." in the pop-up menu of Brushes, then use the brush tool to select this new tip... Friends, would you like to do house spraying?
34. If you want to select a section between two selected areas, hold down the Shift and Alt keys next to any existing selection area to drag and draw a second selection area (a multiplication sign appears next to the mouse cross. Indicates that the overlapping area will be reserved).
35. To delete a square or circle in the selection area, first add any one of the selection areas, and then in this selection area, press the Alt key to drag the mask tool of the rectangle or ellipse.
Then release the Alt key, hold down the Shift key, and drag until you are satisfied. Then release the mouse button and release the Shift key.
36. Delete a selection area from the center. In any selection area, press the Alt key to drag the mask tool of the rectangle or ellipse, then release the Alt key and hold down the Alt key again, and then release the mouse button. Release the Alt key.
37. In the quick mask mode, when you want to quickly switch the mask area or select the area option, hold down the Alt key and move the cursor to the quick mask mode icon and click the mouse.
38. When using the marquee tool, hold down the Shift key to draw a square and a perfect circle; hold down the Alt key to center the selection from the starting point.
39. Use the "Reselect" command (Ctrl+Shift+D) to load/restore the previous selection.
40. Pressing the Alt key while using the lasso tool to draw a selection can switch between the lasso tool and the polygonal lasso tool. Press the space bar while sketching the selection to move the delineating selection.
41. Hold down the Ctrl key and click on the layer's icon (on the slice board) to load its transparent channel, then hold down the Ctrl+Alt+Shift keys to click on the area where the other layer intersects the transparent channels that select the two layers. The original constituency can be retained.
42. The use of the Shift and Alt keys in the Select Box tool: When you select a picture using the Select Box, you want to expand the selection area. By holding down the Shift key, the cursor + will change to Ten+. Drag the cursor so that you can expand the selection area you need based on the original selection. Or select two or more marquees simultaneously in the same subpicture. When you select a picture with the "Select box", you want to subtract the extra picture from the "Select box", hold down the "Alt" button, the cursor "+" will become "Ten-", drag the cursor, then You can leave the picture you need.
43. When using the "select box" to select the picture, you want to get the two marquee superimposed parts, then hold down the "Shift + Alt" key, the cursor "+" will become "10 I", drag the cursor, so you think The necessary part. To get a perfect circle or square in the Marquee, hold down the Shift key.
44. Use the Shift and Alt keys in the Lasso tool: Increase the selection by pressing the Shift key. (The method is the same as 1 in the "Select box".) Decreasing the selection range Press the "Alt" key. (The method is the same as 2 in the "Select box.") Press the "Shift+Alt" key in the area where two marquees are superimposed. (The method is the same as 3 in "Select box")
45. Use the Shift and Alt keys in the Wand tool: Increase the selection by pressing the Shift key. (The method is the same as 1 in the "Select box".) Decreasing the selection range Press the "Alt" key. (The method is the same as 2 in the "Select box.") Press the "Shift+Alt" key in the area where two marquees are superimposed. (The method is the same as 3 in "Select box")
Keyboard shortcuts
46. ​​You can use the following shortcut keys to quickly browse your image: Home scrolls to the top left corner of the image; End scrolls to the bottom right corner of the image; Page UP scrolls above the image; Page Down scrolls to the image Bottom; Ctrl+Page Up scrolls to the left of the image; Ctrl+Page Down scrolls to the right of the image.
47. Press Ctrl+Alt+0 to display the image 1:1.
48. When you want to "tighten" (adjust the space between individual letters), first click between the two letters, then press the Alt key and use the left and right arrow keys to adjust.
49. Restore the settings in the dialog box to the default. After holding down the Alt key, the Cancel key will become the Reset key, and then click the Reset key.
50. To quickly change the value displayed in the dialog box, first click on the number with the mouse, and place the cursor in the dialog box. Then you can use the up and down arrow keys to change the value. If you press the Shift key before changing the value with the arrow keys, the value changes faster.
51. Photoshop6.0 In addition to the familiar shortcut Ctrl+Z (you can freely switch between history and current state), also added Shift+Ctrl+Z (used in order to gradually recover * in accordance with *) and Alt+Ctrl+Z (make The user can follow the * order to gradually cancel * the two shortcut keys. Press Ctrl+Alt+Z and Ctrl+Shift+Z to go backwards and forwards in history, respectively (or use the menus in the History panel to use these commands).
52. Fill function: Shift+Backspace opens the fill dialog; Alt+Backspace and Ctrl+Backspace key groups fill the foreground and background colors respectively; press Alt+Shift+Backspace and Ctrl+Shift+Backspace to fill only the existing pixels when filling the foreground and background colors (keep the transparent area ).
53. The D and X keys on the keyboard quickly switch the foreground and background colors.
54. Use any drawing tool to draw a straight stroke: click the mouse at the starting point, hold down the Shift key, and then move the cursor to the ending point to click.
55. When you open the Curve dialog box, press the Alt key and click the curve box to make the grid lines finer. Then click the mouse to restore the original shape.
56. After selecting a range using the Rectangle (ellipse) selection tool, press and hold the mouse, and then press the space bar to adjust the position of the marquee as desired. After the release, you can adjust the size of the selection.
57. Add a rectangle or ellipse drawn outward from the center. In any of the additional selection areas, first press the Shift key to drag the mask tool for the rectangle or ellipse, then release the Shift key, then press the Alt key, and finally the pine Open the mouse button and release the Alt key. Press Enter or Return to close the slider box. To cancel the change, press the Escape key (Esc). To increase or decrease the value in 10% increments when you open the Pop-up Slider dialog box, hold down the Shift key and press the Up Arrow or Down Arrow key.
58. To preview the CMYK mode color of the RGB mode image on the screen, execute the “View†→ “New View†command first, then generate a new view and execute the “View†→ “Preview†→ “CMYK†command. , you can view the two modes of images at the same time for comparison and analysis.
59. Press the Shift key to drag the marquee tool to limit the marquee to square or round; press the Alt key to drag the marquee tool to draw the marquee from the center; press Shift+Alt key to drag the marquee tool to draw a square or circle from the center Shaped box.
60. To prevent the selection box from sticking to the picture border when using the cutting tool, hold down the Ctrl key while dragging the control point on the selection box of the clipping tool.
The fusion of traditional technology and modern aesthetics behind each product is a deep exploration of the material and structure. With "steel" as the medium, the pure manual process journey is opened to convey the Fireplace culture and design ideas to the whole world.From the profound interpretation of contemporary industrial design, strict selection of each raw material, strict control of each process, so that made in China gives new meaning to the fireplace with traditional handwork and modern aesthetics, paying tribute to consumers.Select strong, fire-resistant high carbon steel surface imported heat - resistant paint. Skillfully use modern technology and traditional manual combination to provide high quality products.The use of high carbon steel, molten metal, heat-resistant paint and the minimalist design in line with the current international trend make it a timeless work of art. Made in China makes Mevera fireplace more trusted by people.
| Name | Hanging steel brazier firepit |
| Material | Corten steel |
| Cooking plate Size | Diameter 800mm |
| Weight | 65KG |
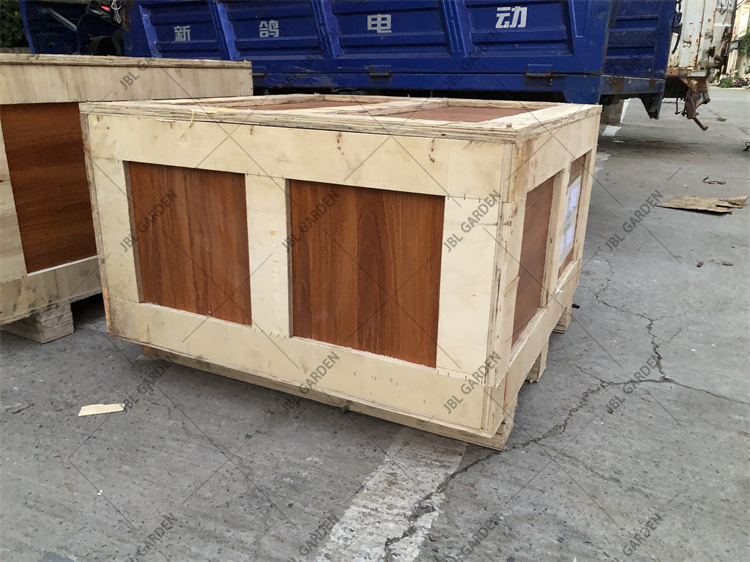
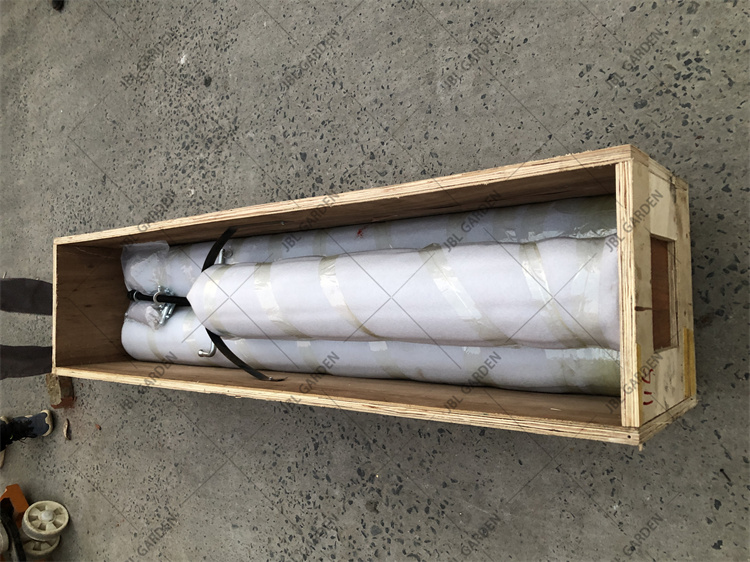
| Packing | wooden box packing |

Packing
Packing will by wooden box.


Ethanol Fire Pit,Bio Ethanol Fire Pit,Alcohol Fire Pit,Biofuel Fire Pit
Henan Jinbailai Industrial Co.,Ltd , https://www.hnjblbbq.com